involves three key modules—M1, M2, and M3—each facilitating a specific aspect of digital health infrastructure. Below is a step-by-step guide to integrating these modules:
What is ABDM ?
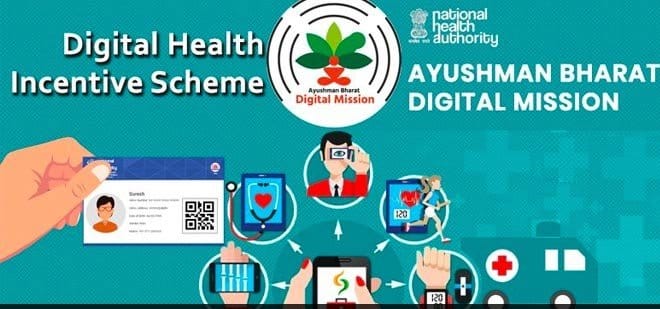
The Ayushman Bharat Digital Mission (ABDM) is a flagship initiative by the Government of India aimed at creating a comprehensive digital health ecosystem. Launched on 27th September 2021, ABDM seeks to establish a robust digital infrastructure that connects patients, healthcare providers, and institutions across the country.
Key Objectives of ABDM
- Universal Health Coverage: Facilitating equitable access to quality healthcare services for all citizens.
- Integrated Digital Health Infrastructure: Developing a backbone to support the seamless exchange of health information across stakeholders.National Health Authority
- Empowered Citizens: Providing individuals with control over their health data, ensuring informed decision-making.
- Enhanced Efficiency and Transparency: Streamlining healthcare delivery processes to improve service quality and accountability.
- Core Components of ABDM
- ABHA (Ayushman Bharat Health Account):
- A unique 14-digit health ID assigned to individuals, enabling them to access and share their digital health records securely.
- Healthcare Professionals Registry (HPR):
- Health Facility Registry (HFR):
- Health Information Exchange and Consent Manager (HIE-CM):
- A system that facilitates the secure exchange of health information based on patient consent.
- Unified Health Interface (UHI):
- A digital platform that enables seamless interaction between patients and healthcare providers.
- National Health Claims Exchange (NHCX):
1.1 Step 1: How to Register Healthcare Professionals (M1)
1.2 Step 2: How to Register Healthcare Facilities (M2)
1.3 Step 3: How to Link and Share Health Data (M3)
1.4 Final Steps After Integration
1.5 Why Integrate with ABDM?
India’s healthcare system is going digital with the Ayushman Bharat Digital Mission (ABDM). It’s revolutionizing the healthcare landscape by making things easier for hospitals, doctors, and patients by connecting everyone on one platform. This guide will give step by step idea of ABDM integration using three core modules of ABDM – M1, M2, and M3 in simple terms. By the end, you’ll have a clear understanding of how to register healthcare professionals, facilities, and securely share health records.
What is ABDM?
The Ayushman Bharat Digital Mission (ABDM) is a government initiative aimed at digitizing India’s healthcare system. Its primary goal is to create a digital healthcare ecosystem that makes medical services more accessible and efficient. Through ABDM, a digital database of doctors and hospitals is created, and it ensures that health records are shared securely with the patient’s consent. By standardizing healthcare processes across the country, ABDM helps improve the quality of care and simplify the healthcare journey for both providers and patients.
Step 1: How to Register Healthcare Professionals (M1)
What is M1?
The M1 module is designed to register healthcare professionals like doctors, nurses, and other medical staff in a national database known as the Healthcare Professionals Registry (HPR). This module ensures that only qualified and verified professionals are part of the system.
Steps to Register:
1. Learn How It Works: Go through the M1 API documentation to fully understand the registration process.
2. Secure Access: Use a secure login method called OAuth 2.0 to connect to the system. You’ll receive login details such as the Client ID and Secret when you sign up on ABDM’s sandbox platform.
3. Submit Professional Details: Provide essential information such as name, qualifications, and license number. This can be done through the provided platform or API.
4. Get HPR ID: After successfully registering, each professional receives a unique HPR ID, which serves as their digital identity.
5. Test It Out: Utilize the sandbox (a testing platform) to ensure that the registration process runs smoothly.
The M1 module is a key step in ensuring that healthcare providers are registered efficiently and their credentials are easily accessible in a secure, national system.
Step 2: How to Register Healthcare Facilities (M2)
To register a healthcare facility under Module 2 (M2), follow the steps below:
1. Log in to the M2 Portal
1.1 Navigate to the M2 Registration Portal.
1.2 Use your authorized admin credentials to log in.
2.Access the Facility Registration Section
2.1 From the dashboard, go to “Facility Management” or “Register Facility”.
2.2 Click on “New Registration” to begin.
3. Enter Facility Details
Fill in the following required information:
3.1 Facility Name
3.2 Type of Facility (e.g., Hospital, Clinic, Diagnostic Center)
3.3 Facility Address (including city, state, and postal code)
3.4 Contact Information (email, phone number)
3.5 Ownership Type (Private/Government/NGO)
3.6 Facility License Number (if applicable)
4. Upload Required Documents
Upload scanned copies or PDFs of:
4.1 Facility license/registration certificate
4.2 Accreditation documents (if any)
4.3 Proof of address
4.4 Any other required approvals (as specified on the form)
5. Add Key Personnel
Enter details for key staff, such as:
5.1 Medical Superintendent or Director
5.2 Contact details and qualifications
5.3 Medical Council Registration Numbers (if required)
6. Submit and Await Verification
6.1 Review all details carefully before submitting.
6.2 Click “Submit for Approval”.
6.3 You will receive an acknowledgment and a tracking number.
7. Post-Submission
7.1 The verification team will review the application.
7.2 If approved, you will receive a confirmation email with your Facility Registration ID.
7.3 If rejected or returned for correction, edit and resubmit as guided.
Step 3: How to Link and Share Health Data (M3)
After registering your healthcare facility (M2), the next step is to link and share health data as part of Module 3 (M3). This ensures patient records, lab results, and visit histories are accessible across the national digital health ecosystem.
1. Log in to the M3 Data Sharing Portal
1.2 Log in to the M3 Data Sharing Portal
1.3 Use your facility’s credentials issued during M2 registration.
2 . Access the Data Integration Settings
2.1 Navigate to the “Data Sharing” or “API Integration” section.
2.2 Choose your preferred mode of integration:
Manual Data Entry
CSV Upload
API-Based Integration (recommended for EMR/HMIS users)
3. Configure Facility APIs (for Automated Sharing)
If you’re using hospital/clinic software:
3.1 Retrieve your Facility API Key and Endpoint URLs.
3.2 Provide this information to your IT team or vendor.
3.3 Ensure your system maps data to standardized formats (e.g., HL7 FHIR).
4. Link Patient Records
To ensure seamless patient health record updates:
4.1 Use patient’s ABHA (Health ID) while creating or updating records.
4.2 Ensure ABHA is linked to each visit or medical document (lab results, prescriptions, etc.)
5. Share Health Data Securely
Depending on your integration mode:
5.1 Manual Mode: Enter/update records directly in the portal.
5.2 CSV Upload: Follow the format guide, validate the file, and upload.
5.3 API Mode: Your system will push data automatically.
Health data shared may include:
ePrescriptions
Lab test results
Outpatient/inpatient visits
Discharge summaries
6. Consent Management
- Data sharing is consent-based.
- Patients must approve data access via the ABDM Consent Manager.
- You’ll receive notifications when consent is granted, and access logs will be maintained.
7. Monitor Data Sharing Logs
- Use the “Audit Logs” tab to review what data was shared, with whom, and when.
- Monitor for errors or incomplete transmissions.
Final Steps After Integration
Once your healthcare facility is integrated and health data sharing is enabled through Module 3 (M3), follow these final steps to ensure smooth operations, compliance, and data quality.
1. Perform a Test Data Submission
- Conduct a test upload or API push to verify successful data transmission.
- Check if data appears correctly in the recipient system or national health exchange.
- Validate:
- Patient ABHA linkage
- Accurate timestamps
- Clinical terminology (e.g., SNOMED, LOINC)
2. Train Your Staff
- Train front desk, lab, and clinical teams to:
- Capture ABHA (Health ID) from patients
- Obtain consent when required
- Use the new integrated flow for entering or syncing health data
- Provide quick guides or cheat sheets at each workstation.
3. Monitor Dashboard & Logs
- Regularly check:
- Submission status logs
- Error reports
- Consent history
- Look for failed uploads, missing ABHA data, or schema mismatches.
4. Ensure Patient Consent Is Handled Properly
- Integrate the ABDM Consent Flow if not already done.
- Ensure staff:
- Know how to initiate a consent request
- Understand when consent is mandatory (e.g., data sharing with external providers)
5. Maintain Data Quality & Standards
- Periodically review shared data to ensure:
- Correct use of medical codes (ICD-10, LOINC, SNOMED)
- No missing mandatory fields
- Dates and identifiers are formatted properly
6. Stay Updated on Guidelines
- Follow updates from NDHM/ABDM regarding:
- New data standards
- Integration requirements
- Security compliance mandates
Subscribe to official communications or developer updates to stay current.
Why Integrate with ABDM?
(Ayushman Bharat Digital Mission)
Integration with the ABDM transforms how healthcare is delivered, recorded, and accessed in India. Here’s why it’s important for healthcare providers:
1. Seamless Digital Health Ecosystem
- Connects hospitals, clinics, labs, pharmacies, and insurers into one unified network.
- Enables instant access to health records—anytime, anywhere—with patient consent.
2. Empower Patients with ABHA
- ABHA (Ayushman Bharat Health Account) gives each patient a unique Health ID.
- Integration lets patients view their medical history digitally across facilities.
- Boosts transparency and ownership of health data.
3. Better Clinical Decisions
- Providers can access a patient’s medical history (lab results, prescriptions, diagnoses).
- Reduces duplication of tests and medication errors.
- Enables continuity of care across locations and doctors.
4. Efficient Workflows & Record-Keeping
- Automates data entry via APIs or EMR systems.
- Reduces paperwork and manual errors.
- Simplifies audits, claims, and reporting.
5. Strengthens Trust and Credibility
- Being “Live on ABDM” signals that your facility meets national data standards.
- Enhances institutional reputation among patients, insurers, and government programs.
6. Enables Digital Public Health Initiatives
- Shared data can help track health trends (e.g., disease outbreaks, vaccination coverage).
- Supports data-driven policymaking and targeted health interventions.
7. Unlocks Access to New Opportunities
- Eligible for public schemes (e.g., Ayushman Bharat PM-JAY).
- Enables integration with telemedicine, insurance claim platforms, and digital therapeutics.
- Positions your facility for future innovations like health registries and AI tools.
8. Mandatory for Future Compliance
- Gradually becoming mandatory for empanelment, digital services, and government schemes.
- Early integration helps you stay ahead of regulatory requirements.